
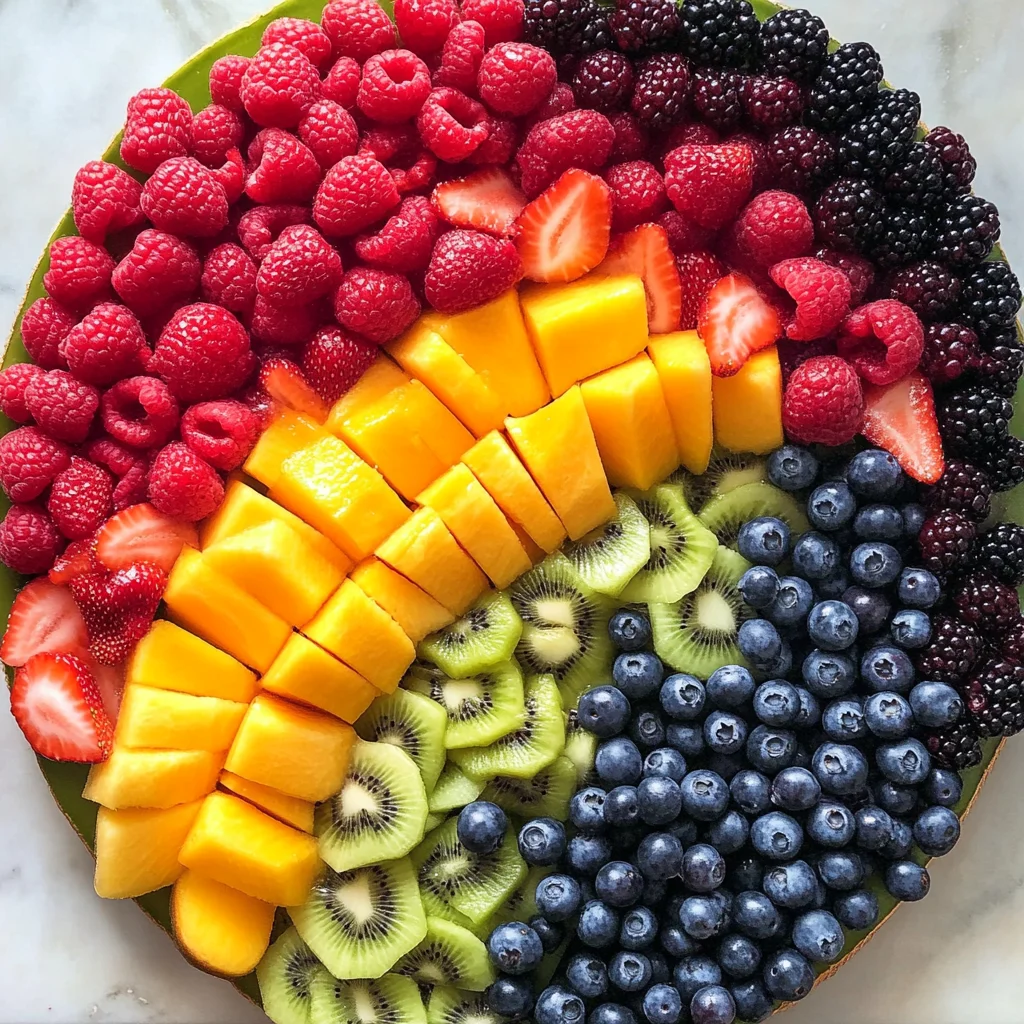
Oh so vibrant, this gorgeous Fruit Rainbow is an eye-catching yet simple way to jazz up basic fruit platters. Perfect for parties, brunches, or any celebration, this delightful dish showcases a variety of colorful fruits arranged beautifully. It’s easy to prepare and can be customized based on your favorite fruits, making it suitable for various occasions.
Why You’ll Love This Recipe
- Visually Stunning: The bright colors create an impressive display that will capture everyone’s attention.
- Easy to Prepare: With minimal preparation and no cooking required, this recipe is perfect for any skill level.
- Healthful Snack: Packed with vitamins and nutrients, this fruit platter is a healthy option for both kids and adults.
- Versatile Serving Options: Ideal as a breakfast addition, snack, or party treat; it fits any occasion seamlessly.
- Customizable Ingredients: Feel free to swap out fruits based on seasonal availability or personal preferences.
Tools and Preparation
To create your stunning Fruit Rainbow, you’ll need some essential tools. These will help simplify the process and ensure a beautiful presentation.
Essential Tools and Equipment
- Cutting board
- Sharp knife
- Large platter or tray
- Paper towels or clean kitchen towels
Importance of Each Tool
- Cutting board: Provides a stable surface for cutting fruits safely.
- Sharp knife: Ensures clean cuts for a polished look in your fruit display.
- Large platter or tray: Allows ample space for arranging the fruits without crowding.
- Paper towels or clean kitchen towels: Useful for drying fruits after washing, preventing excess moisture.
Ingredients
Oh so vibrant, this gorgeous Fruit Rainbow is an eye-catching yet simple way to jazz up basic fruit platters. Perfect for parties or brunch!
For the Fruit
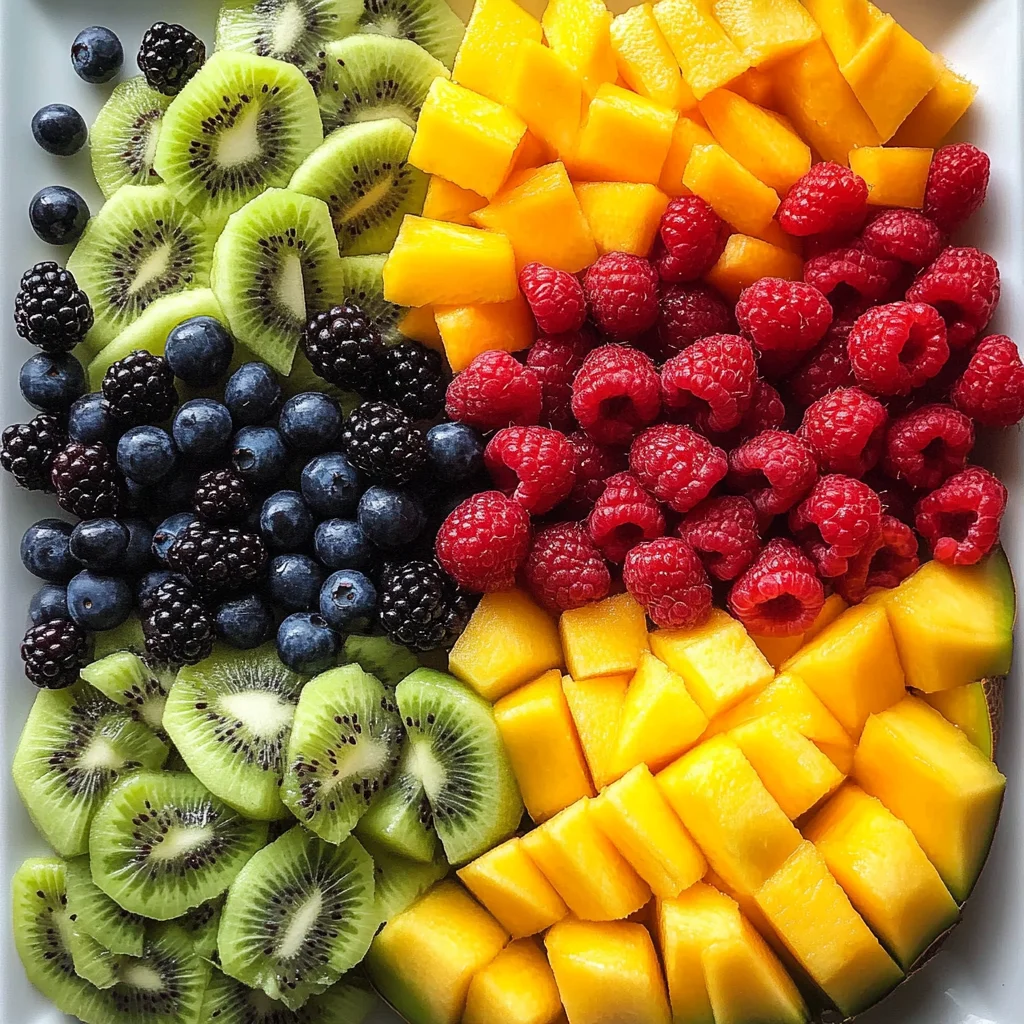
- 1 cup raspberries
- 1 cup strawberries
- 1 cup cut cantaloupe
- 1 cup cut mango
- 3-4 green kiwi fruits
- 1 cup blueberries
- 1 cup blackberries
How to Make Fruit Rainbow
Step 1: Prepare the Fruits
- Wash the berries thoroughly under cool water.
- Spread them out on paper towels or clean kitchen towels to dry slightly.
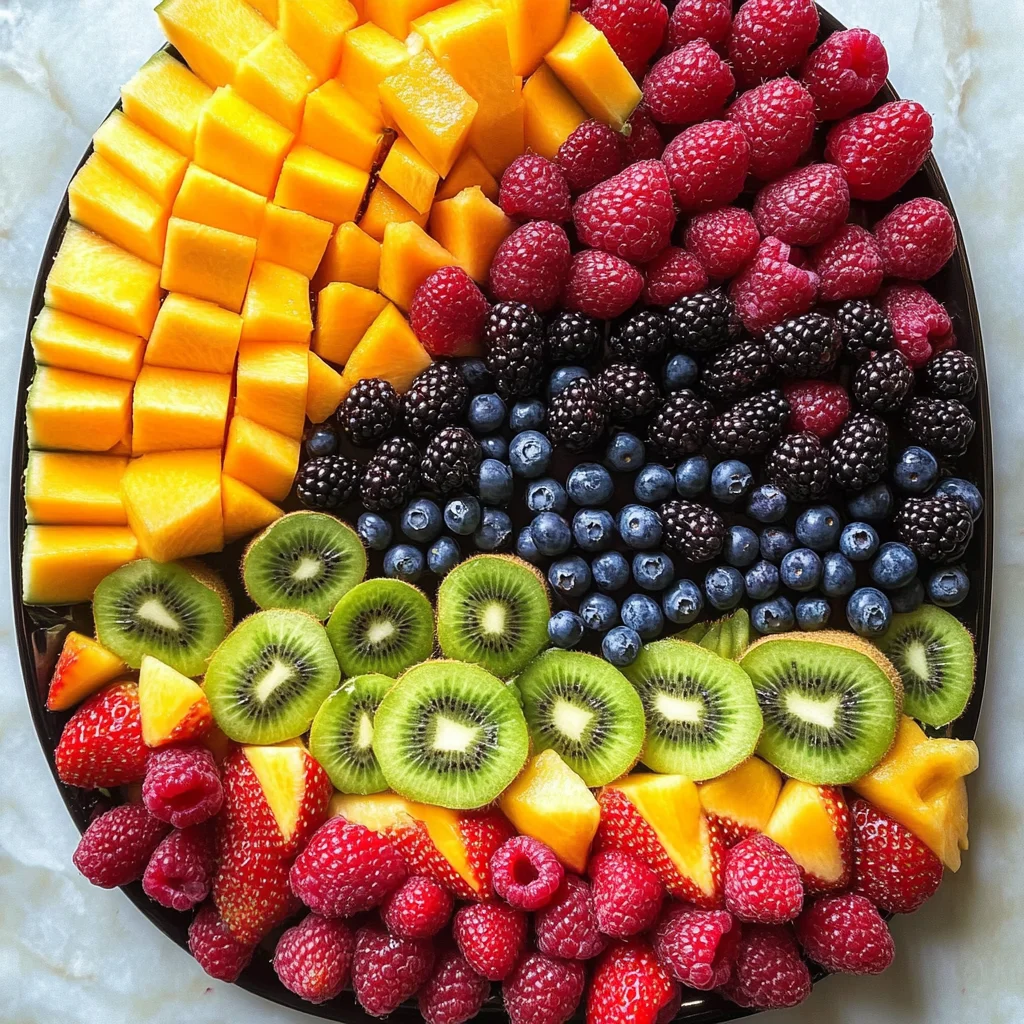
- Cut the cantaloupe, mango, and kiwi into bite-sized pieces or slices.
Step 2: Arrange the Fruits
- Take a large platter or tray and begin arranging one type of fruit at a time.
- Create a colorful rainbow pattern by layering the fruits in arcs.
- Reserve a few pieces of each fruit to fill in gaps later or add height where needed.
Step 3: Serve and Enjoy!
- Once you’ve arranged all the fruits beautifully, step back and admire your work!
- Serve immediately at room temperature for the best flavor and presentation.
Enjoy this delightful Fruit Rainbow as part of your next breakfast spread or party table—it’s sure to impress!
How to Serve Fruit Rainbow
This vibrant and colorful Fruit Rainbow is not only a feast for the eyes but also a delightful addition to any gathering. It can be served in various ways to enhance your dining experience.
Brunch Buffet
- Create a beautiful brunch buffet where the Fruit Rainbow stands out as the centerpiece. Pair with yogurt or whipped cream on the side for added flavor.
Fruit Skewers
- Thread pieces of the Fruit Rainbow onto skewers for a fun and easy-to-eat option. These are perfect for picnics or outdoor events.
Layered Parfaits
- Layer the fruits in clear cups with yogurt or granola to create stunning parfaits. This option adds texture and makes for an elegant presentation.
Dessert Topping
- Use the Fruit Rainbow as a topping for cakes or pancakes. Its bright colors will elevate any dessert, making it visually appealing and delicious.
How to Perfect Fruit Rainbow
To create the ultimate Fruit Rainbow, keep these tips in mind for optimal flavor and presentation.
-
Choose Fresh Fruits: Select ripe, seasonal fruits for the best taste and appearance. Fresh ingredients make all the difference.
-
Use a Colorful Variety: Aim for a mix of colors to enhance the visual appeal. Combining red, orange, yellow, green, blue, and purple fruits creates that gorgeous rainbow effect.
-
Keep Fruits Dry: Dry washed fruits thoroughly before arranging them. Excess moisture can cause them to become soggy or lose their vibrant look.
-
Arrange with Care: Take your time when arranging fruits on the platter. A well-organized presentation will impress your guests and make serving easier.
Best Side Dishes for Fruit Rainbow
Pairing side dishes can elevate your Fruit Rainbow experience. Here are some excellent options to consider:
-
Yogurt Dip
Serve with a creamy yogurt dip flavored with honey or vanilla for added sweetness that complements the fruit. -
Granola
Offer crunchy granola on the side for added texture. It pairs nicely when layered with fruit in parfaits. -
Cheese Platter
Include a selection of cheeses like brie, goat cheese, or cheddar to balance the sweetness of the fruit. -
Nut Mix
Provide a mix of nuts such as almonds and walnuts alongside for extra crunch and protein-rich snacking. -
Hummus
A sweet hummus made from chickpeas blended with honey can serve as an interesting dip that pairs well with certain fruits. -
Whole Grain Crackers
Serve whole grain crackers alongside to add a savory element that balances out the sweetness of the fruit platter. -
Chia Seed Pudding
This healthy option pairs well with fruit and adds an exciting texture contrast to your spread. -
Vegetable Platter
For variety, include fresh vegetables like cucumbers and bell peppers with a light dip, offering something refreshing alongside your fruity treat.
Common Mistakes to Avoid
To create the perfect Fruit Rainbow, avoid these common mistakes.
- Skipping the washing step: Always wash your fruits thoroughly before using them. This ensures they are clean and safe to eat.
- Cutting fruits too small: Make sure to cut your fruits into bite-sized pieces. If they are too small, they may not hold their shape on the platter.
- Not arranging fruits properly: Avoid placing all fruits in a random order. Arrange them in a rainbow pattern for visual appeal and a stunning presentation.
- Using overly ripe fruits: Choose fresh and firm fruits for your Fruit Rainbow. Overripe fruits can become mushy and unappealing.
- Forgetting to reserve fruit pieces: Reserve some pieces of each fruit until the end. This allows you to fill gaps and enhance the overall look of your Fruit Rainbow.
Storage & Reheating Instructions
Refrigerator Storage
- Store leftover Fruit Rainbow in an airtight container.
- It can last up to 2-3 days in the refrigerator.
Freezing Fruit Rainbow
- For longer storage, freeze individual fruit pieces on a baking sheet before transferring them to a freezer-safe bag.
- Frozen fruit can last up to 6 months but may lose texture upon thawing.
Reheating Fruit Rainbow
- Oven: Not recommended for reheating as fresh fruit is best enjoyed cold.
- Microwave: You may use it on low power for a few seconds but be cautious not to overheat.
- Stovetop: Avoid heating; serve fresh for the best taste and texture.
Frequently Asked Questions
Here are some common questions about making a Fruit Rainbow.
How do I make my Fruit Rainbow more colorful?
You can add more varieties of fruits like oranges or purple grapes. The more colors, the more vibrant your Fruit Rainbow will be!
Can I customize my Fruit Rainbow?
Absolutely! Feel free to swap in any seasonal fruits you prefer or have on hand for a personalized touch.
What is the best way to serve a Fruit Rainbow?
Serve it as a centerpiece at brunches or parties. It’s eye-catching and encourages guests to enjoy healthy snacks!
How can I ensure my fruits stay fresh longer?
Store your prepared fruit in airtight containers and keep them refrigerated until you’re ready to serve.
Final Thoughts
The Fruit Rainbow is not only visually stunning but also versatile enough for any occasion. Customize it with your favorite fruits or even add dips like yogurt for extra flavor. Give this recipe a try, and impress your family and friends with this delightful treat!